Saturday, February 26, 2011

Dammit Dolls

 I made a bunch of these little dolls for my girlfriends this holiday season.  They’re great stress relievers! (mine’s been thrown at a wall or two)

What you’ll need:
-       Fabric (how much you need depends on how big you make the dolls.  I used about 1/3 yard (maybe a bit less) for each doll, which was 4” x 7”).
-       Stuffing (I used fiberfill but cotton or anything else works too)
-       Sewing machine (optional, but will make your life easier)
-       Needle
-       Thread to match your fabric
-       Buttons (for the eyes)
-       Red embroidery floss (for the mouth)
-       Heart charm (optional)

What to do:
1.     Start by drawing yourself a pattern on paper.  You can draw it anyway you want; just make sure it’s not too big.
2.     Place your pattern on top of your fabric (fold the fabric in two so that you’re cutting out two identical pieces).
3.     Cut out your doll, leaving about ½” all the way around the pattern.
4.     On the machine, sew the two halves of your doll together (inside out), leaving one side of it open (it’s easiest to leave the arm-pit to thigh area on one side open) to put in the stuffing.
5.     While the doll is still inside out, sew on the eyes, heart, and mouth.
6.     Turn your doll right side out.
7.     Stuff your doll (use a knitting needle, chopstick, etc. to push the stuffing into the arms, legs, and head)
8.     Sew the open side shut with a needle and thread
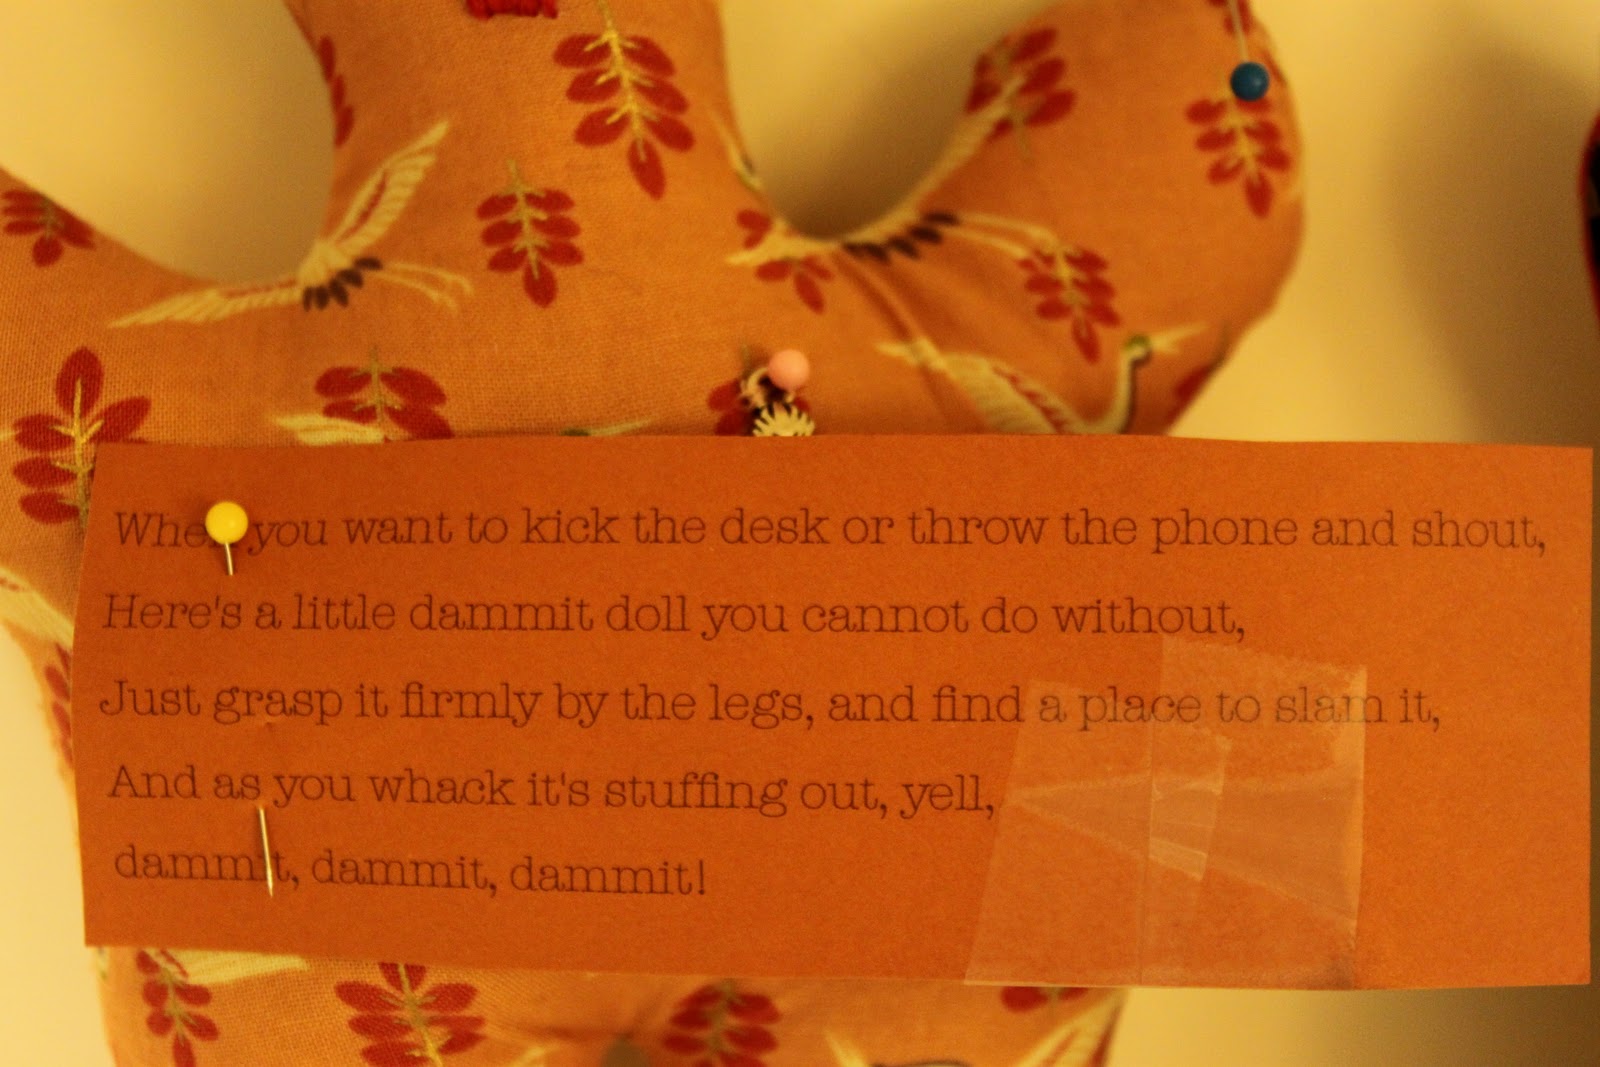
9.     OPTIONAL: I made little cards with poems to go along with each doll.  I also attached a handful of pushpins.
*The poem reads: when you want to kick the desk or throw a phone and shout, here’s a little dammit doll you cannot do without, just grasp it firmly by the legs, and find a place to slam it, and as you whack it’s stuffing out, yell, dammit, dammit, dammit!


Sunday, February 20, 2011

Best Buttermilk Pancakes


What you’ll need :
-       2 cups sifted flour
-       1 teaspoon salt
-       1 ¼ teaspoons soda
-       ¾ teaspoons baking powder
-       2 eggs, unbeaten
-       2 cups fresh buttermilk
-       ¼ cup melted butter


Sift dry ingredients together.  Add remaining ingredients and stir lightly to just moisten dry ingredients.  Mixture will be thick and lumpy.  Drop by spoonfuls into lightly greased griddle, spreading batter with spoon.  Turn cakes as soon as browned and cook Under side until browned.  Makes five to six servings.

Saturday, February 19, 2011

Tea Towel Apron


What you’ll need:

- One large tea towel (mine was 29” x 21”)

- About 2 yards of twill tape (I used 1” wide twill tape but you can use any width and even bias tape in a pinch)

- Sewing machine (you can sew it by hand but a machine is a bit easier)

1. First you’ll need to pleat the top of your tea towel. I made 2 ½” pleats on either side. Secure pleats with pins.

2. Tack the pleats approx. 7 inches down with a pin (depending on where your waist is). I secured the pleats at a bit of an angle (look at the photos to see what I mean by this).

3. On the machine, secure top folds with a stitch (I did a decorative stitch all the way across the top so it looks a bit more attractive).

4. Secure the lower tacks with a couple stitches (if the thread matches the fabric well enough you’ll barely see them).

5. Next you’ll need to cut the twill tape. Measure how much you need for the neck and waist-ties (I used roughly 25” for the neck and two 25” pieces for the waist). To attach the loop at the top sew each end near the corners. To attach the waist-ties sew them along the seam of the towel (I used a zig-zag stitch to make sure they were extra secure). *Tip: to make all the ties look cleaner, fold each end under before sewing it down.

And that’s it! Your stylish new apron is ready to wear

.